|
 The Choose specimen
tab is where you'll choose which specimen to include with your labels. There are two methods
for making your choice -- one method uses the current filter, the other method uses the
"Tag needs printing" checkbox. The Choose specimen
tab is where you'll choose which specimen to include with your labels. There are two methods
for making your choice -- one method uses the current filter, the other method uses the
"Tag needs printing" checkbox.
This is also where you'll make your selection of how many labels to print for each specimen
included in the layout.
|
 |
* |
For a general discussion on selecting which labels to print refer
to the Basic steps for printing labels document.
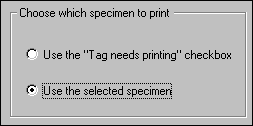
If you choose the Tag needs printing method, your labels will include
only those specimen with that box checked.
See the Herbarium View for a snapshot
showing where to find this checkbox.
If you choose to use the selected specimen method, your labels will include
only those specimen that meet the criteria of the currently selected filter.
(These are the items shown in the Specimen List when you started the Print Labels operation.)
|
 |
* |
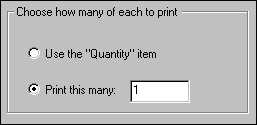
There are two ways to specify how many labels to print for each specimen.
One way is to use the Quantity item.
See the Garden View for a snapshot showing where
to find this item. If you use this item, each specimen will have a different number
of labels printed. Note that no labels will be printed for any specimen whose
Quantity item is blank.
The second way to specify how many labels to print is to enter a number in
the Print this many item. Using this option, each specimen will have the
same number of labels printed.
|
 |
* |
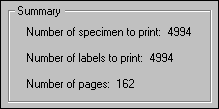
The summary area gives you some feedback on the number of labels to be printed.
The Number of labels to print will be an even multiple of the Number of specimen to print
when you use the second option for specifying quantities. If you use the first option, either of these
two quantities could be much greater or much less than the other.
It's especially important to check
this summary area when using the Tag needs printing or Quantity options since you'll often
find surprises with these options.
..................................................
|
|
![]() Basic steps for printing labels
Basic steps for printing labels![]() Tips for setting up accurate label layouts
Tips for setting up accurate label layouts![]() Defining label text and data values
Defining label text and data values![]() Defining label fonts and colors
Defining label fonts and colors